I had lots of fun this weekend making cards. Mostly experimenting! The top card has a flower made from a combination of punches. Blossoms punch and one from Blossoms Petal Builder. The center of the flower is a rose I made using a five petal punch. The flower started out with So Saffron card stock. The back layer I spritzed pretty heavy with a tango tangerine mist. Used alcohol and a stamp refill for color. The middle layer I again spritzed but not as much. Yes, I did scrunch up the petals in the back. Only when all was dry I glued them together.
The stamps I used were Button,Button and Tagtastic. Unfortunately the Tagtastic set is discontinued.
The second card mixes it up I had a tag from Stamp of Authenticity. I layered a stamp on top of this from Friends Never Fade.. Both of these stamp sets are gone. Boo hoo.The top of the card is DSP in the color Perfect Plum. I added some left over paper, ribbon and buttons mounted on a purple paper. If you look close you can see I distressed the purple
The last card is a favorite of mine. Making the flower out of the word punch was a blast. I shortened the length of each punch as I got closer to the center. The flower is More Mustard card stock.. Made a small spiral flower for the center. The pearl in the center of the flower was SU's white and I used my blender pens and Not Quite Navy ink to make it stand out. The Modern punch has a saying from the stamp set Creative Elements. It's one of my favorites. The paper behind the flower is a left over piece.
Hope everyone had a great weekend. Bye for now.
Sunday, June 3, 2012
Saturday, June 2, 2012
Made this card today with an old stamp set called "Stamp of Authenticity" Used a die to cut the notebook edge. Embossed the Very Vanilla card stock. Card mounted on Soft Suede. Ribbon placed between the Soft Suede and the Very Vanilla. A button tops the bow and it's connected using embroidery floss. I distressed the edges and antiqued them with Soft Suede Classic Ink. Fun to do
Have a great day..
Have a great day..
Friday, June 1, 2012
Hello everyone. Posting my latest cards. Top card uses 1" circles to form base of card. The oval frame is embossed and the oval is stamped with a background stamp in pink and the forefront bird and script is in gray. Both the frame and the oval are left over from a previous project.
The second card is bright and happy. I do need to work on my "sun". Used a round stamp and then cut into it to make rays. Looks more like a gear! The background of this card is a Bingo stamp. I cut letters and numbers out of the summer smooches paper. The word relax is stenciled over white card stock. The ink is Daffodil Delight.
Last shown is a card using Summer Smooches paper in a more casual format. I tore the sheets to fit the card. I embossed the solid Daffodil Delight paper. Used my paper punch to make lines for stitching. Orange thread looks great on the card. The flower is a stamp and a punch. The center of it is a fabric Designer brad. A little tulle netting finishes the flower. I cut two punch designs out in Tangerine Tango and placed under flower. Added sentiment and a bow and we're done.
Hope you enjoyed today's cards.
Wednesday, May 30, 2012
Cascading Card
This card is aptly called a cascading card. Uses two sides of the paper, front and back. Love this design. This is a card I made in a recent class.
Baby cards for little boys!
Little boys are fun with card making. About anything blue works great. The little dresser card folds open from the top. Thanks for stopping by.
Friday, May 25, 2012
Baby cards
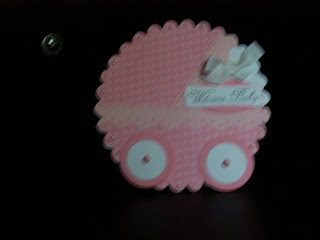
Had so much fun in class making these three baby cards. The first picture is a depiction of a baby carriage. Second picture is a baby in her crib. I had cropped all of these pictures so you could view them better, then I couldn't find the file. The last picture is a card designed to look like a onsie.
Yes these are all baby girl cards. Tomorrow I will post the baby boy cards.
Saturday, May 19, 2012
WOW Wedding Cards
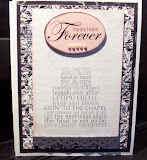
 Hi everyone. Sorry it's been awhile since I've posted. Went to a card swap this afternoon. This is the card I swapped. I call it a hybrid card because it uses the program "My Digital Studio" and I use punches and embellishments to give it more dimension. Most of the paper I printed at home. StampinUp gives me awesome tools to work with. Can you see the embossing on the layer under the phrase layer? Lots of texture.


Tuesday, May 15, 2012
Had such a good time in class today. Made one card and one gift card holder. I put a teabag in the gift card holder. So cute. Used the SimplyScoring tools to mark the folds of the gift card.

The card I made was a very simple but elegant card. Used velum and embossing powder. Also embossed oval frame. I don't know if it shows but the flowers are velum over solid punched design. We embossed the white flowers, under the velum, with a dotted embossing folder.Used a Stampin'Up marker to add center color. Lastly we used designer brads to complete the layers. Sounds much more difficult than it really was. Thanks for stopping by. Tomorrow is another day of class and I can't wait.

The card I made was a very simple but elegant card. Used velum and embossing powder. Also embossed oval frame. I don't know if it shows but the flowers are velum over solid punched design. We embossed the white flowers, under the velum, with a dotted embossing folder.Used a Stampin'Up marker to add center color. Lastly we used designer brads to complete the layers. Sounds much more difficult than it really was. Thanks for stopping by. Tomorrow is another day of class and I can't wait.
Sunday, May 13, 2012
Subscribe to:
Posts (Atom)


